| Main | Registration | Login | RSS | Sunday, 2024-04-28, 3:03 AM |
TIPSBYOHM | |
| Welcome Guest |
|
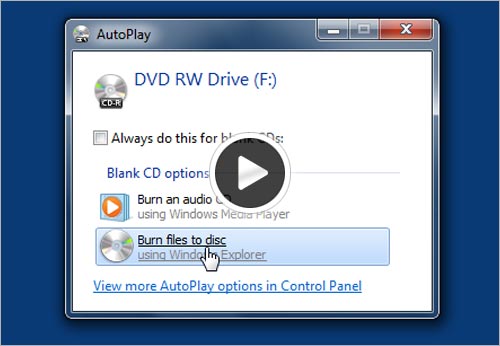
Windows 7.How to Burn a Data CD or Data DVD in Windows 7 Using Media Player? You can burn a data CD or data DVD in Windows 7 using Media Player. An audio CD can contain just approximately eight minutes of music. On the other hand, if you burn a data CD or data DVD in Windows 7 using Media Player, it will be able to hold numerous hours of music. Video files and pictures can also be added to the data discs.
Advantages When you burn a data CD or data DVD in Windows 7, the Windows Media Player does not transform the selected files to a different format prior to saving them to a blank data disc, so the files stay in the compressed condition. This allows you to put much more items on a single disc. As the format of the files is not changed, the quality of the files remains the same. You can burn a data CD or data DVD in Windows 7 using Media Player as follows:
It can take a
while to burn a data disc. If your selected items cannot fit in one disc, you
also have the choice of burning the rest of the items to a different disc. A
data DVD is not the same as a DVD-Video disc e.g. the movie DVD you buy or rent
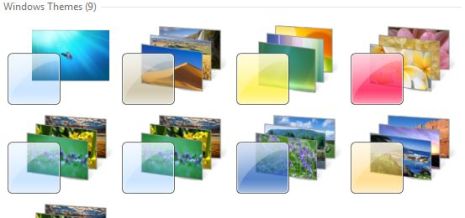
from the store. Hidden Themes for Windows 7 Windows 7 by default has only few themes
available for customization. People who are not satisfied with these in build
themes can get few more themes for Windows 7 which are
actually hidden. These themes are available for certain regional
countries such as Australia, Canada, Great Britain, United States and South
Africa. These themes can be revealed and used by the following steps 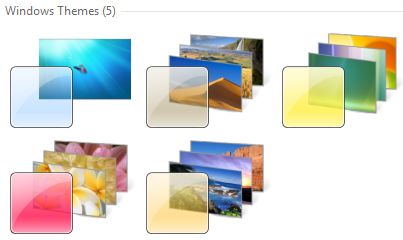 1. Open Windows Explorer and click
Organize
here are the best ones to help you get the most out of your new OS. In this
article, we will focus on the Windows 7 interface to get you
started on the road to becoming a Windows 7 Power User. In Part 2, we will be
looking at advanced tips for usability, performance, and security. 1. Use Keyboard ShortcutsUsing the mouse, you can drag-‘n-dock windows to either side of the screen, or drag it to the top to maximize it. These keyboard shortcuts are even faster:
2.Rearrange System Tray Icons
You can rearrange icons on the taskbar as you wish and start new (or switch to running) instances of the first ten taskbar programs using Win+1, Win+2, and so on. The cool thing is you can also rearrange system tray icons. Reorder them on the tray or move them outside or back in the tray. Take control of what you want to always keep an eye on, and from which apps you’ll require notifications. 3. Access Jump Lists with the Left Mouse ButtonJump Lists usually show up when you right-click on a taskbar icon. However, they can also be accessed by holding the left mouse button and dragging upwards. If you’re using a laptop touchpad or a touch screen, this is convenient because you do not have to click any button to access a context menu. 4. Add Any Folder to Favorites
You can add any library or folder to the Favorites section in Windows Explorer. To add a folder, navigate to it in Explorer, right-click Favorites in the left navigation pane, and select Add current location to Favorites. Now you get quick access to your favorite folders in all File->Save As dialogs! 5. Pin Frequently Used Folders to the TaskbarRight-click, drag, and pin your favorite folders to Windows Explorer on the taskbar. They will now show up in the Jump List when you right click on Explorer giving you quick access to your favorite folders. 6. Pin Control Panel to the Taskbar
You cannot pin the Control Panel to the taskbar via the Start Menu or by drag and drop. Open the Control Panel and right-click its taskbar icon to pin it to the taskbar. An advantage of this is that Control Panel’s Jump List allows quick access to recently used functions. 7. Create Keyboard Shortcuts for ProgramsYou can create keyboard shortcuts for any program in Windows 7. Right-click the program icon and select Properties. Select the Shortcut tab, click in Shortcut key, to set the keyboard shortcut for that program.
8. Open Command Prompt in Any FolderLike the command prompt? Miss the ‘Open Command Window Here’ Windows XP power toy? Press ‘Shift’ when right-clicking on a folder to get that option in the context menu. This also works on the desktop. No power toy required!
9. View Expanded ‘Send To’ MenuPress Shift when right-clicking on a folder to get an expanded Send To menu. 10. Adjust Screen Text with Clear TypeUse Clear Type Tuner for the best look on your LCD monitor or laptop screen. Run ‘cttune.exe’ from the Start Menu search box, or go to the Control Panel Display applet, and select Adjust ClearType Text from the left.
11. Get Exact Colors On Your ScreenIf you are an artist or you work with colors, use the Calibrate Color option in the Control Panel Display applet or run dccw.exe from the Start Menu search box. You can adjust gamma, brightness, contrast, and color balance, ensuring that colors are displayed correctly on your screen. 12. Customize the Power ButtonIf you restart your computer more often than you shut it down, change the default Shutdown power button to Restart. Right-click on Start, select Properties, and choose the Power button action that you use the most.
13. Customize Number of Items in Jump Lists & Start MenuRight-click Start, select Properties, click Customize and choose the number of recent programs to be shown in the Start Menu and the number of items displayed in Jump Lists from the Start Menu Size section below. 14. Search Internet from the Start Menu
Enable Internet search from the Start Menu using your default browser. Run GPEDIT.MSC from the Start Menu search box to start the Group Policy Editor. In the left pane, go to User Configuration->Administrative Templates->Start Menu and Taskbar. In the right pane, right-click to Edit and Enable Add Search Internet link to Start Menu.
15. Add Videos to Start MenuWindows 7 does not place a link to your videos on the Start Menu by default. To add a link to your videos on the Start Menu, right-click Start, select Properties, click on Customize. In the Videos section at the bottom, choose Display as a link.
Did you like these tips? Tell us or share your tricks with us in the comments! Don’t forget to watch out for Part 2!
|

BY:-Anand kumar ohm 

|
|||||||||||||||||||||||||||||||||||||||||||||||||||||||||


| Copyright MyCorp © 2024 |
 |
 1
1